一、前言
做开发这么久了,动手搭过项目,查过资料,但是一直以来都没有很好的将整个流程记录下来,所以这次打算把自己在做 vue3 项目的过程记录下来,希望能给后面自己再搭项目的时候提供一些参考,而不是再去翻别人的博客了。
二、正文
1. 项目准备
首先,我们需要准备好项目的基本环境,包括:「项目名称」、「项目描述」、「项目技术栈」、「预处理器」、「UI 组件库」等。 不是专业的架构师,所以考虑的问题不是很全面,比如依赖对等、打包构建、性能优化等等,这些在后面遇到时,再去思考如何解决。
这是一个网站项目,走简约路线,所以没有太多的结构,或者说是复杂的交互,表单类组件也是比较少的。那么,定下来就使用 「vite」来创建项目,使用 「ts」语言。延用遗以往的习惯,使用 「scss」预处理器。 别的项目都用到了 「element-ui」或者是 「vant」, 那这次就使用 「ant-design-vue」 来做 UI 组件库。
- 项目名称: official-website
- 项目描述: 一个基于 vue3 的官方网站,包括首页、新闻、教程、文档、社区等模块。
- 项目技术栈: vue3 + vite + typescript + ant-design-vue + scss + pina + fetch
2. 项目初始化
使用命令创建 「vue」项目:pnpm create vite@latest vue3-ts-app --template vue-ts。
初始化依赖: pnpm install。
将当前项目与远程仓库进行一个关联,到此,一个基本的 vue 项目即搭建好了,后续将添加何种依赖文件。
3. 项目布局
首先确定了使用不同的「layout」组件进行布局,<router-view></router-view> 进行内容占位。在不同的模块里会展示不同的布局,因此使用各个「layout」作为基础路由组件。
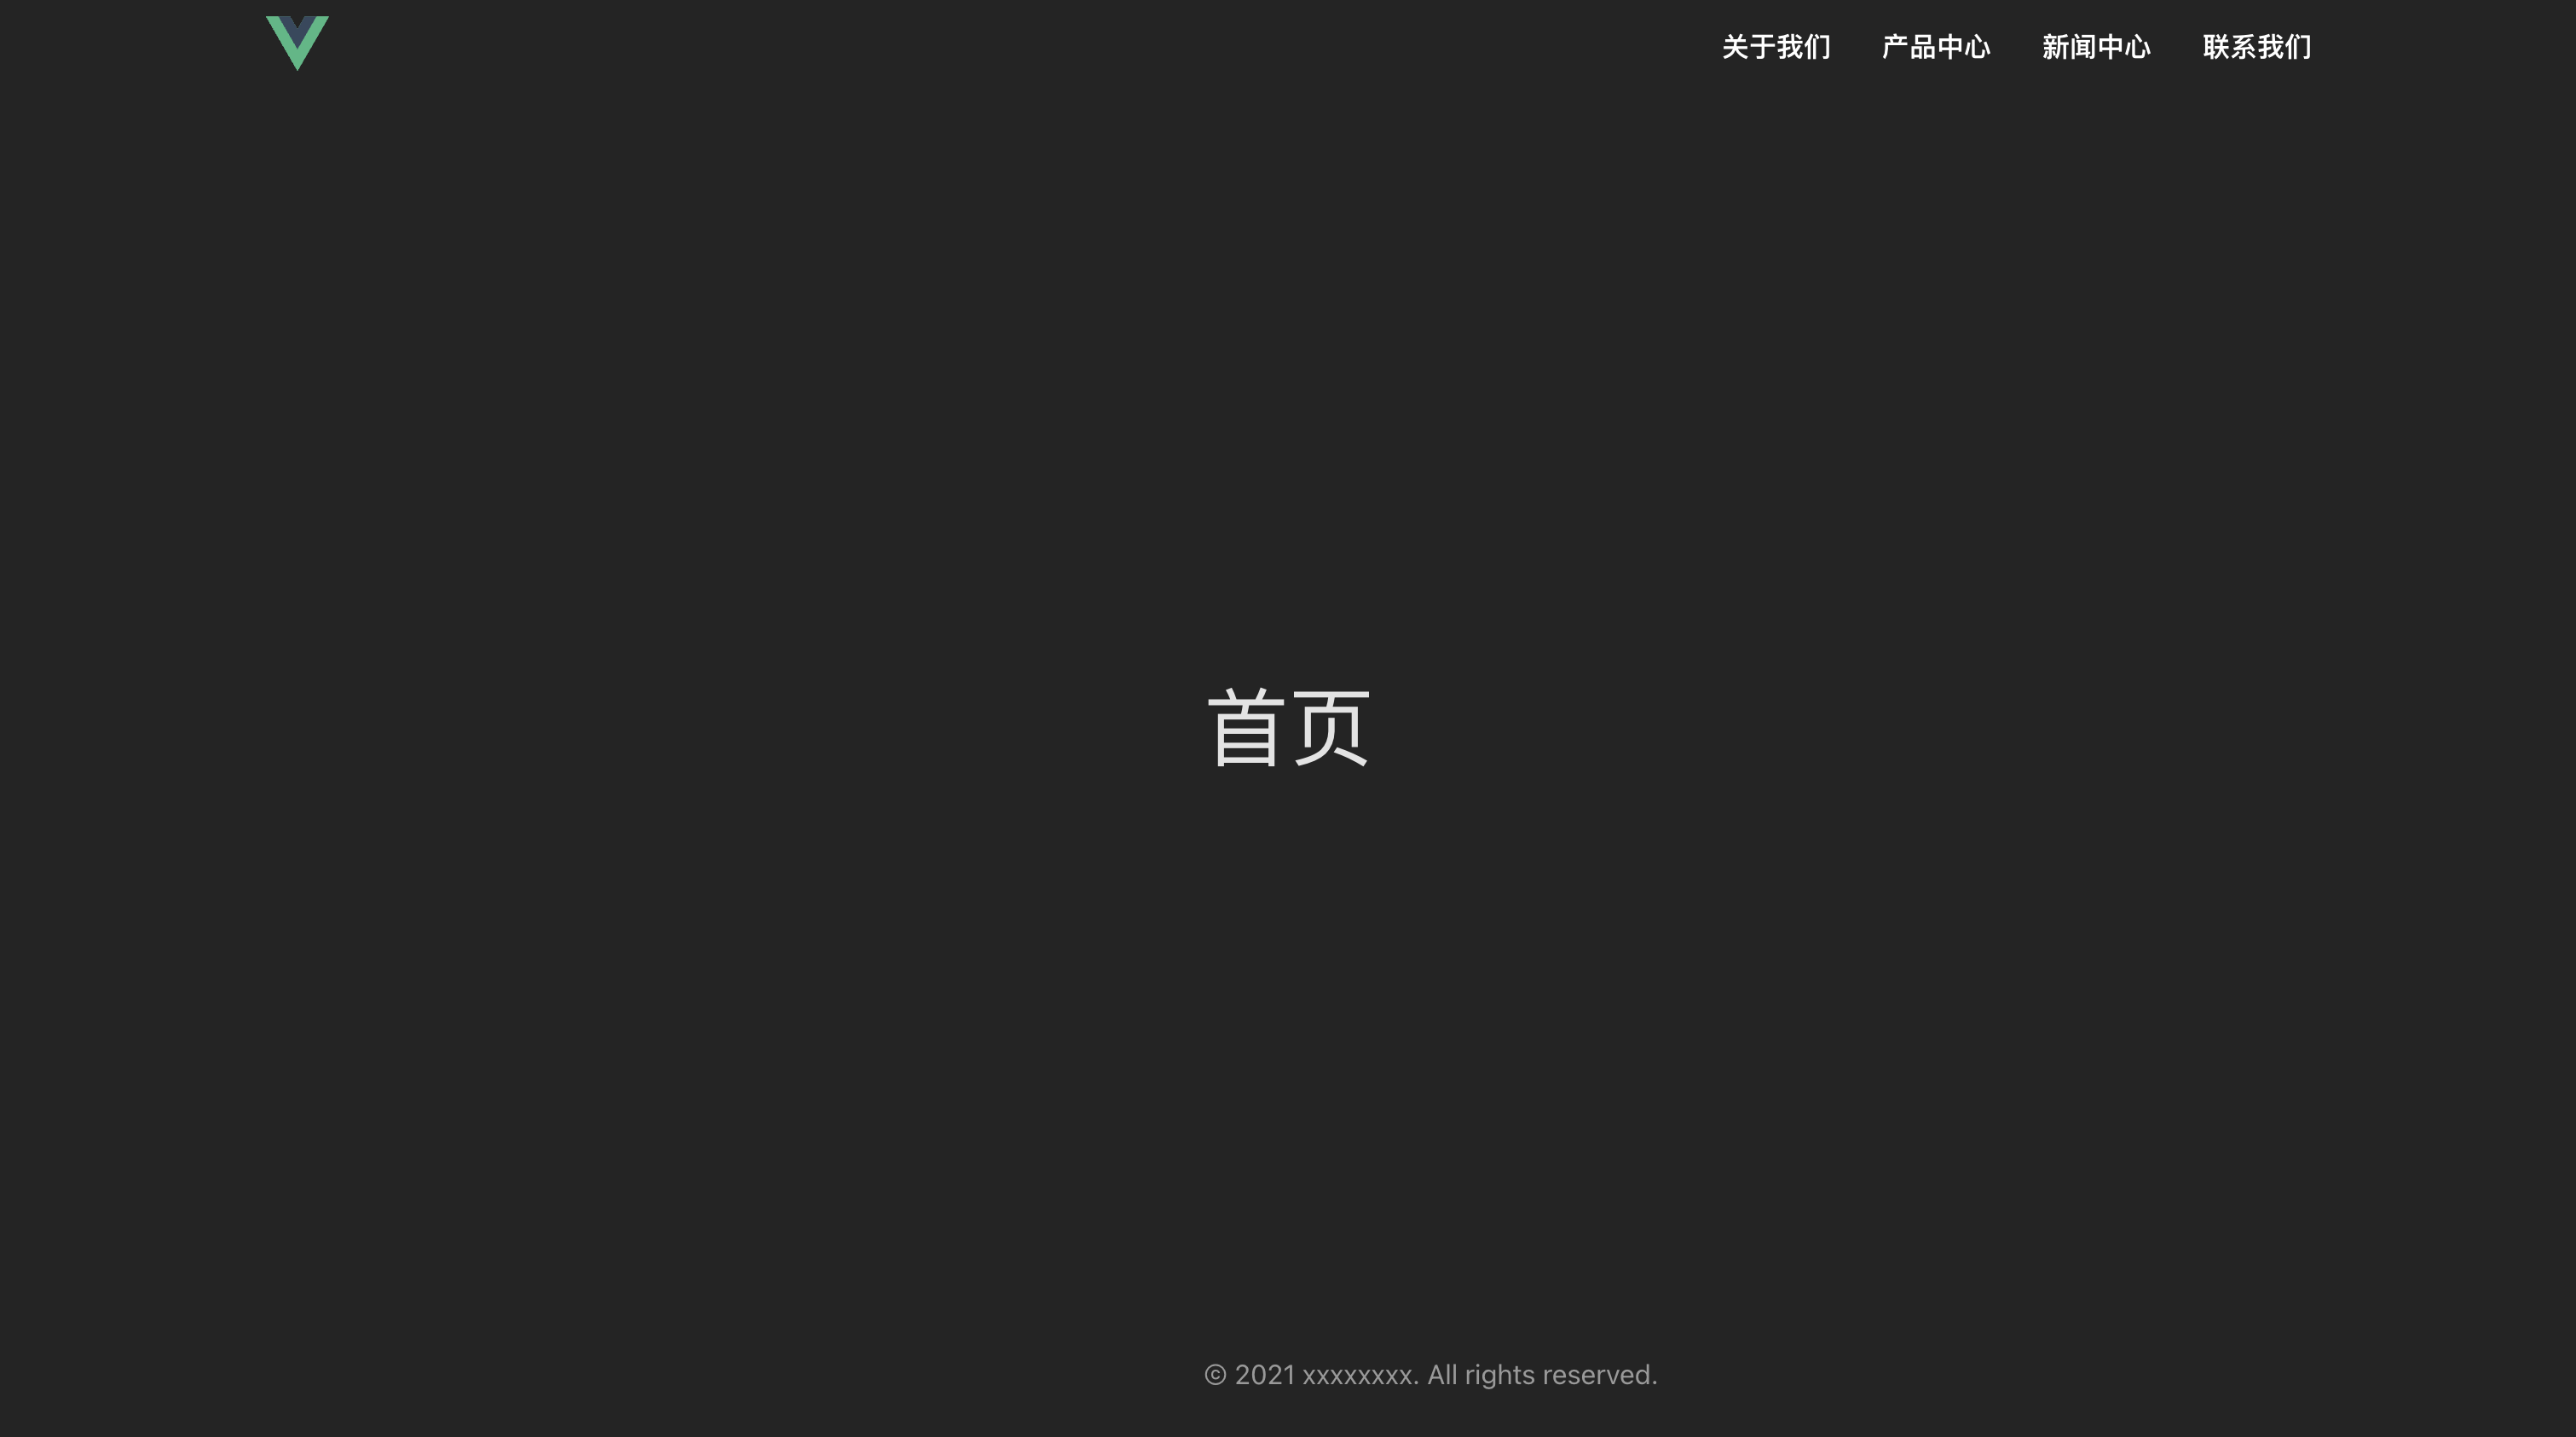
如网页的整体布局为顶部为 「tab」切换,中部为主要内容区域,底部为 「关于我们」、「使用帮助」等组件,整体上为上中下,中间内容区域即使用 <router-view></router-view>。
1
2
3
4
5
6
7
<template>
  <Header></Header>
  <div class="main">
    <router-view></router-view>
  </div>
  <Footer></Footer>
</template>
大致布局如上,在路由表中配置如下:
1
2
3
4
5
6
7
8
9
10
11
12
13
14
15
16
17
18
19
20
 {
    path: '/',
    redirect: '/home',  // 访问 `/` 会重定向到 `/home`
  },
  {
    path: '/',
    component: Layout,  // Layout 作为父组件
    children: [
      {
        path: 'home',     // 首页子路由
        name: 'home',
       component: () => import("@/views/home/index.vue"),
      },
      {
        path: 'profile',  // 个人中心子路由
        name: 'profile',
        component: () => import("@/views/profile/index.vue"),
      }
    ]
  }
网页上的效果如下:
4. 路由配置
这一步可以说是非常重要的,重要的点并不是说路由有多难配置,而是导入路由所会发生的问题。
4.1 安装路由依赖
使用 pnpm install vue-router@4 安装路由依赖。
4.2 创建路由实例
在 src/router 目录下创建 index.ts 文件,并导出一个路由实例。
1
2
3
4
5
6
7
8
9
10
11
12
13
14
15
16
17
18
19
20
21
22
23
24
25
26
27
28
29
30
import { createRouter, createWebHistory } from "vue-router";
const routes = [
  {
    path: "/",
    redirect: "/home",
  },
  {
    path: "/",
    component: () => import("@/layout/index.vue"),
    children: [
      {
        path: "home",
        name: "home",
        component: () => import("@/views/home/index.vue"),
      },
      {
        path: "profile",
        name: "profile",
        component: () => import("@/views/profile/index.vue"),
      },
    ],
  },
];

const router = createRouter({
  history: createWebHistory(),
  routes,
});

export default router;
4.2 导入路由实例
在 src/main.ts 中导入路由实例,并使用。
1
2
3
4
5
6
7
import { createApp } from "vue";
import App from "./App.vue";
import router from "./router";

const app = createApp(App);
app.use(router);
app.mount("#app");
到此为止,路由配置基本完成。但是你会发现,在类似 component: () => import("@/layout/index.vue") 这样的文件导入里会报错,提示 「找不到模块“@/layout/index.vue”或其相应的类型声明」。
这其实就是 ts 无法识别这种语法。
4.3 解决路由导入问题
这里有三个地方要改动:
-
vite.config.ts
配置别名,将
@指向src目录。1 2 3 4 5 6 7 8 9 10 11 12
import { defineConfig } from "vite"; import vue from "@vitejs/plugin-vue"; import path from "path"; export default defineConfig({ plugins: [vue()], resolve: { alias: { "@": path.resolve(__dirname, "./src"), }, }, });
-
tsconfig.app.json
配置
compilerOptions.paths选项,将@/*指向src/*目录。1 2 3 4 5 6 7 8 9
{ "compilerOptions": { // ...其他 "baseUrl": "./", "paths": { "@/*": ["src/*"] } } }
-
shims-vue.d.ts
声明
*.vue文件的类型。1 2 3 4 5
declare module "*.vue" { import { DefineComponent } from "vue"; const component: DefineComponent<{}, {}, any>; export default component; }
注意一点,在一些 ai 回答中,告诉你的是在根目录创建,然后你会发现并没有生效。
实际上,你需要在
src目录下创建shims-vue.d.ts文件。
到此为止,和路由相关的文件导入才算是解决,能在页面上正确显示。
4.4 文件目录
目前完成了路由配置,涉及的文件目录如下:
1
2
3
4
5
6
7
8
9
10
11
12
13
14
15
16
17
18
19
20
├── src
│   ├── components
│           ├── Header
│                 ├── index.vue
│           ├── Footer
│                 ├── index.vue
│   ├── layout
│           ├── index.vue
│   ├── router
│           ├── index.ts
│   ├── shims-vue.d.ts
│   ├── App.vue
│   ├── main.ts
│   └── views
│           ├── home
│                 ├── index.vue
│           ├── profile
│                 ├── index.vue
├── tsconfig.app.json
├── vite.config.ts
5. 样式配置
使用 scss 预处理器,安装依赖:pnpm install sass -D。
5.1 使用
在 「style」里指定 「lang=”scss”」。
1
2
3
4
5
6
<style lang="scss" scoped >
 div {
  font-size: 50px;
  color: red;
}
</style>
5.2 配置全局样式
在 assets 目录下创建 styles目录,并在global.scss文件中编写全局样式。如root`样式、字体样式、全局类名等。
1
2
3
4
5
6
7
8
9
10
11
12
13
14
15
16
17
18
19
20
21
22
23
24
25
:root {
  font-family: Inter, system-ui, Avenir, Helvetica, Arial, sans-serif;
  font-synthesis: none;
  text-rendering: optimizeLegibility;
  -webkit-font-smoothing: antialiased;
  -moz-osx-font-smoothing: grayscale;
}
body {
  margin: 0;
  padding: 0;
  font-size: 16px;
}

* {
  box-sizing: border-box;
}

.df {
  display: flex;
}
@for $i from 1 through 100 {
  .fs#{$i} {
    font-size: $i + px;
  }
}
在 main.ts 中导入全局样式文件。
1
import "./assets/styles/index.scss";
6. 状态管理配置
使用 pinia 进行状态管理,安装依赖:pnpm add pinia、pnpm add @types/pinia -D。
6.1 创建 store 实例
可以创建一个 .ts 来创建 store 实例,并将其导出。但此时简单一点,直接在 main.ts 中创建 store 实例,并使用。
1
2
3
4
5
6
7
8
9
10
11
import { createApp } from "vue";
import App from "./App.vue";
import router from "./router";
import { createPinia } from "pinia";

const app = createApp(App);
const pinia = createPinia();

app.use(router);
app.use(pinia);
app.mount("#app");
6.2 定义 store 模块
在 src/stores 目录下创建 useUserStore.ts 文件,用来管理和用户有关的信息。
为了习惯与搭配「vue3」风格,「pinia」使用「组合式」风格来定义 store 模块。
1
2
3
4
5
6
7
8
9
10
11
12
13
14
15
16
17
18
// useUserStore.ts
import { defineStore } from "pinia";
import { reactive } from "vue";
export const useUserStore = defineStore("user", () => {
  const user = reactive({
    name: "Lmy",
  });

  // action
  const changeName = (name: string) => {
    user.name = name;
  };

  return {
    user,
    changeName,
  };
});
6.3 使用 store
在组件中使用 store,可以直接在 setup 函数中使用 useUserStore 实例。
1
2
3
4
5
6
7
8
9
10
11
12
13
14
15
16
17
18
19
20
// Home.vue
<script setup lang="ts">
import { useUserStore } from "@/stores/useUserStore";
const userStore = useUserStore();
</script>
<template>
  <div class="home">
    <div class="name">姓名:{ { userStore.user.name } }</div>
  </div>
</template>

// Profile.vue
<script setup lang="ts">
import { useUserStore } from "@/stores/useUserStore";
const userStore = useUserStore();

const changeName = () => {
  userStore.changeName("张三");
};
</script>
6.4 简单持久化
可以简单的将数据进行持久化处理。如数据是对象的,可以将其序列化为字符串,存入 localStorage 中,然后直接修改「对象」中的属性。
1
2
3
4
5
6
7
8
9
10
11
const storedUser = localStorage.getItem("user");
const user = reactive({
  name: storedUser ? JSON.parse(storedUser).name : "Lmy",
});
watch(
  user,
  (newUser) => {
    localStorage.setItem("user", JSON.stringify(newUser)); // 更新 localStorage
  },
  { deep: true }
);
7. UI 组件库配置
使用 「ant-design-vue」 作为 UI 组件库,安装依赖:pnpm add ant-design-vue@4.x。
根据推荐,使用 「ant-desing-vue」 的图标组件包,安装依赖:pnpm add @ant-design/icons-vue。
7.1 全局注册
使用 「ant-desing-vue」推荐的方式,全局注册组件。
在 main.ts 中全局注册 ant-design-vue 组件。
1
2
3
4
5
6
7
8
9
10
11
12
13
14
import { createApp } from "vue";
import App from "./App.vue";
import router from "./router";
import { createPinia } from "pinia";
import Antd from "ant-design-vue";
import "ant-design-vue/dist/reset.css";

const app = createApp(App);
const pinia = createPinia();

app.use(router);
app.use(pinia);
app.use(Antd);
app.mount("#app");
7.2 使用
在组件中使用 「ant-design-vue」 组件,直接在模板中使用组件名。
1
2
3
4
5
6
7
<script setup lang="ts">
import { h } from "vue";
import { QuestionCircleOutlined } from "@ant-design/icons-vue";
</script>
<template>
  <a-button type="primary" :icon="h(QuestionCircleOutlined)">按钮</a-button>
</template>
8. 网页主题模式
8.1 模式概述
在视图上,或者说是在效果上有两种模式,一种是「深色模式」,一种是「浅色模式」。 可通过两种方式切换网页的主题模式,一种是手动「主题切换按钮」,另一种是「系统」自动切换。
因此,引申出第三种状态 ———— 「auto」。 假设默认是「auto」模式,则监听 mediaQuery 的变化,给「html」元素添加或移除「dark」类,来切换网页的主题模式。如果是手动切换,则模式可以为「dark」、「light」、「auto」三种。
8.2 实现思路
结合 「pinia」,保存模式状态 hld-theme-appearance,默认为「auto」。仅当 hld-theme-appearance为「auto」时,才监听 mediaQuery 的变化,切换网页的主题模式。如 hld-theme-appearance 以下情况:
-
auto监听
mediaQuery的变化,移除或添加dark类,并修改「switch」按钮的状态。 -
dark这个是手动切换的结果,当
hld-theme-appearance从「auto」变为 「dark」时,添加dark类,并修改「switch」按钮的状态。 -
light这个是手动切换的结果,当
hld-theme-appearance从「auto」变为 「light」时,移除dark类,并修改「switch」按钮的状态。
8.3 实现代码
通过自定义 「hooks」来实现主题模式的切换。 使用方法: const { localTheme, setLocalTheme } = useTheme();
创建 useTheme.ts 文件,定义 useTheme 函数。
1
2
3
4
5
6
7
8
9
10
11
12
13
14
15
16
17
18
19
20
21
22
23
24
25
26
27
28
29
30
31
32
33
34
35
36
37
38
39
40
41
42
43
44
45
46
47
48
49
50
51
52
53
54
55
56
57
58
59
60
61
62
63
64
65
66
67
68
69
70
71
72
73
74
75
76
77
78
79
80
81
82
83
84
85
86
87
88
89
90
91
import { ref, watch, watchEffect, onMounted } from "vue";
import { useSettingStore } from "@/stores/useSettingStore.ts";

export const useTheme = () => {
  const localTheme = ref("light");
  const settingStore = useSettingStore();

  const systemTheme = ref("light"); // 系统主题

  // 获取主题
  const getLocalTheme = (theme: string) => {
    systemTheme.value = theme; // 保存当前系统主题
    const storeTheme = settingStore.hldThemeAppearance;
    // 如果缓存中主题为 auto,则根据系统主题更新页面样式
    if (storeTheme === "auto") {
      localTheme.value = systemTheme.value;
    } else {
      localTheme.value = storeTheme;
    }
    setSystemTheme(localTheme.value);
  };

  // 设置主题
  const setSystemTheme = (theme: string) => {
    if (theme === "dark") {
      document.documentElement.classList.add("dark"); // 启用深色模式
    } else {
      document.documentElement.classList.remove("dark"); // 移除深色模式
    }
  };

  const setLocalTheme = (checked: boolean) => {
    if (checked) {
      if (systemTheme.value === "dark") {
        settingStore.setHldThemeAppearance("auto");
      } else {
        settingStore.setHldThemeAppearance("dark");
      }
      getLocalTheme("dark");
    } else {
      if (systemTheme.value === "dark") {
        settingStore.setHldThemeAppearance("light");
      } else {
        settingStore.setHldThemeAppearance("auto");
      }
      getLocalTheme("light");
    }
  };

  // 获取系统主题
  const mediaQuery = window.matchMedia("(prefers-color-scheme: dark)");

  onMounted(() => {
    const theme = mediaQuery.matches ? "dark" : "light";
    getLocalTheme(theme);
  });

  // 监听系统主题变化
  watch(
    () => systemTheme.value,
    (newTheme) => {
      getLocalTheme(newTheme);
    },
    { immediate: true }
  );

  // 监听系统主题变化
  watch(
    () => settingStore.hldThemeAppearance,
    () => {
      getLocalTheme(systemTheme.value); // 更新主题
    }
  );

  // 监听 `prefers-color-scheme` 变化
  watchEffect(() => {
    const handleChange = (e: any) => {
      const theme = e.matches ? "dark" : "light";
      getLocalTheme(theme);
    };
    mediaQuery.addEventListener("change", handleChange);
    return () => {
      mediaQuery.removeEventListener("change", handleChange);
    };
  });

  return {
    localTheme,
    setLocalTheme,
  };
};
8.4 样式文件
使用 「css」自定义属性,来设置主题模式的样式。
1
2
3
4
5
6
7
8
9
10
11
12
13
14
15
16
17
18
19
20
21
22
23
24
:root {
  --hl-m-text: var(--hl-b-text-light-1);
  --hl-m-bg: var(--hl-b-white);
}
html.dark {
  color-scheme: dark;
}
.dark {
  --hl-m-text: var(--hl-b-text-dark-1);
  --hl-m-bg: var(--hl-b-black);
}
:root {
  --hl-b-white: #fff;
  --hl-b-black: #1a1a1a;
  --hl-b-black-pure: #000;
  --hl-b-text-light-1: #213547;
  --hl-b-text-light-2: rgba(60, 60, 60, 0.7);
  --hl-b-text-light-3: rgba(60, 60, 60, 0.33);
  --hl-b-text-light-4: rgba(60, 60, 60, 0.18);
  --hl-b-text-dark-1: rgba(255, 255, 255, 0.87);
  --hl-b-text-dark-2: rgba(235, 235, 235, 0.6);
  --hl-b-text-dark-3: rgba(235, 235, 235, 0.38);
  --hl-b-text-dark-4: rgba(235, 235, 235, 0.18);
}
8.5 ant-design-vue 主题配置
根据官方文档,初步配置 「ant-design-vue」 的主题。在 App.vue 中,使用 「a-config-provider」 组件,配置 「ant-design-vue」 的主题。
1
2
3
4
5
6
7
8
9
10
11
12
13
<template>
  <a-config-provider
    :theme="{
      token: {
        colorPrimary: '#F84F9F', // 主题色
      },
      algorithm:
        localTheme == 'light' ? theme.defaultAlgorithm : theme.darkAlgorithm, // 算法
    }"
  >
    <router-view />
  </a-config-provider>
</template>
9. 国际化
目前国际化只涉及到 「语言」的变化,可切换的语言初步定为 「中文」和「English」。
目前接触到的语言切换有三种方式:
-
子域名切换: 使用「前缀」来进行不同的域名切换。
- en.example.com 代表英文版本
- cn.example.com 代表中文版本
-
URL 路径切换: 使用「路径」来进行不同的语言切换。
- example.com/en 代表英文版本
- example.com/cn 代表中文版本
-
缓存切换: 使用「缓存」来进行不同的语言切换。
- 缓存中保存当前语言,每次访问页面,根据缓存中的语言切换语言。
- url 路径不会体现语言信息。
本项目使用第二种方式,通过「路径」来进行语言切换。结合第三方插件和「vscode」插件,可方便的进行国际化语言配置。
9.1 插件配置
主要针对 vue-i18n 插件的一些处理。
9.1.1 依赖安装
安装依赖:pnpm add vue-i18n
9.1.2 创建实例&语言文件
在 src/lang 中创建 index.ts 文件,用来创建 vue-i18n 实例。
1
2
3
4
5
6
7
8
9
10
11
12
13
14
15
16
17
18
19
20
21
22
23
24
25
26
27
28
import { createI18n } from "vue-i18n";
import cn from "./cn.json";
import en from "./en.json";

const messages = {
  en: {
    ...en,
  },
  cn: {
    ...cn,
  },
};
const getLang = () => {
  const lang =
    location.pathname.split("/")[1] || navigator.language.split("-")[0] || "en";
  if (lang == "zh") {
    return "cn";
  }
  return lang;
};

const i18n = createI18n({
  legacy: false,
  locale: getLang(), // 默认语言
  messages,
});

export default i18n;
在 src/lang 中创建 cn.json 和 en.json 文件,用来存放语言文件。
1
2
3
4
5
6
// cn.json
{
  "home": {
    "title": "首页"
  }
}
9.1.3 实例组册
在 main.ts 中注册 i18n 实例。
1
2
3
4
5
6
7
8
9
10
11
12
13
14
15
16
17
import { createApp } from "vue";
import { createPinia } from "pinia";
import App from "./App.vue";
import router from "./router";
import i18n from "./lang";
import Antd from "ant-design-vue";
import "ant-design-vue/dist/reset.css";
import "./assets/styles/style.css";
import "./assets/styles/index.scss";

const app = createApp(App);
const pinia = createPinia();
app.use(pinia);
app.use(router);
app.use(Antd);
app.use(i18n);
app.mount("#app");
9.2 ant-design vue 组件国际化配置
根据官方文档进行国际化配置。
在 App.vue 中,引入语言文件包,并对 「a-config-provider」 组件进行配置。官方文档中提到了组件库中所有需要国际化的组件,另外对于时间类组件,需要因为第三方时间处理插件,并对其进行配置,时间类组件的语言配置才会生效。
例子中使用了 dayjs 库来处理时间格式化。 安装依赖:pnpm add dayjs。
对「a-config-provider」与 「dayjs」进行语言配置。
1
2
3
4
5
6
7
8
9
10
11
12
13
14
15
16
17
18
19
20
21
22
23
24
25
26
27
28
<script setup lang="ts">
import { theme } from "ant-design-vue";
import { useTheme } from "@/hooks/useTheme";
import { useI18n } from "vue-i18n";
import enUS from "ant-design-vue/es/locale/en_US";
import zhCN from "ant-design-vue/es/locale/zh_CN";
import dayjs from "dayjs";
import "dayjs/locale/zh-cn";
const { localTheme } = useTheme();
const { locale } = useI18n();

dayjs.locale("en");
</script>
<template>
  <a-config-provider
    :locale="locale === 'en' ? enUS : zhCN"
    :theme="{
      token: {
        colorPrimary: '#663399',
        colorBgContainer: 'var(--hl-m-input)',
      },
      algorithm:
        localTheme == 'light' ? theme.defaultAlgorithm : theme.darkAlgorithm,
    }"
  >
    <router-view />
  </a-config-provider>
</template>
9.3 国际化切换组件
在组件中进行语言的切换处理,简单实用 「switch」来验证语言的切换功能。
1
2
3
4
5
6
7
8
9
10
11
12
13
14
15
16
17
18
19
20
21
22
23
24
25
26
27
28
29
30
<script setup lang="ts">
import { onMounted, ref } from "vue";
import { useRoute, useRouter } from "vue-router";
import { useI18n } from "vue-i18n";
const route = useRoute();
const router = useRouter();
const { locale } = useI18n();

const checked = ref(false);
const onLangChange = (value: boolean) => {
  const lang = value ? "en" : "cn"; // 切换语言
  locale.value = lang;
  setRoute(lang);
};
const setRoute = (lang: string) => {
  router.push(`/${lang}${route.path.slice(3)}`); // 重定向路由
};
onMounted(() => {
  setRoute(locale.value);
  checked.value = locale.value === "en";
});
</script>
<template>
  <a-switch
    v-model:checked="checked"
    checked-children="en"
    un-checked-children="zh"
    @change="onLangChange"
  />
</template>
其中,「重定向路由」的功能如下,假设当前的路由为 /cn/about,切换语言后,路由会重定向到 /en/about。并且,因为之前在 scr/lang/index.ts 中处理了 getLang 函数,所以切换语言后刷新页面,语言并不会改变,具有了持久化的效果。
到此,自定义的语言和 「ant design vue」 的语言切换都没问题了。
9.4 路由处理
要解决重定向的问题,如访问 / 路径,应该重定向到 lang/home页面。当路由时,应重定向或者是拼接好路径,让路径具有语言信息。
在路由守卫中对路由进行拦截,拼接好路径,然后重定向到正确的页面。
1
2
3
4
5
6
7
8
9
10
11
12
13
14
// router/index.ts
import i18n from "@/lang";

router.beforeEach((to, from, next) => {
  const lang = i18n.global.locale.value;
  const path = to.path;

  // 检查路由是否包含语言前缀,如果没有,则添加
  if (!path.startsWith(`/${lang}`)) {
    next({ path: `/${lang}${path}` }); // 添加当前语言前缀并跳转
  } else {
    next(); // 否则直接跳转
  }
});
此方法为方便使用 router.push(),直接填写目标路径,而不需要在 path 前面添加语言前缀。当然也可以先拼接好路径,然后使用 router.push() 方法。
注意,如果使用 router-link 组件,不拼接好路径,则会引起警告。如 「[Vue Router warn]: No match found for location with path “/home”」
1
<router-link to="/">首页</router-link>
因此,建议是不要使用 router-link 组件,而使用声明式导航。
9.5 vscode 插件
到之前的配置,国际化已经可以完美使用了。但是在使用过程并不方便,有两点体现,需要手动编写属性和看不出内容。
9.5.1 书写属性的问题
正常情况下,我们需要在 cn.josn 和 en.json 中书写相同属性。如:
1
2
3
4
5
6
// cn.json
{
  "home": {
    "title": "首页"
  }
}
1
2
3
4
5
6
// en.json
{
  "home": {
    "title": "Home"
  }
}
如果数据过多,属性命名就会非常困难,假设有 100 个属性,那么我们需要在 cn.json 和 en.json 中都写 100 个属性。当然了,如果属性过多,我们可以把 cn.json 的中文替换成英文,再整个「粘贴」到 en.json 中。
但是如果属性不是很多,还是不免需要手动在 cn.json 和 en.json 中书写相同的属性。另外,如果后期需改内容,如英文的 「hello」需要修改成「Hello」,则需要在 en.json 找到对应的属性再进行修改。
9.5.2 内容展示的问题
在代码里,我们需要使用 { { $t('home.title') } } 来展示内容,这根本不知道 home.title 是什么,这将难以维护。

9.5.3 i18n Ally 插件
简单的两个实用功能即自动生成 json 文件的属性和自动翻译。
-
捕捉需要翻译的内容

-
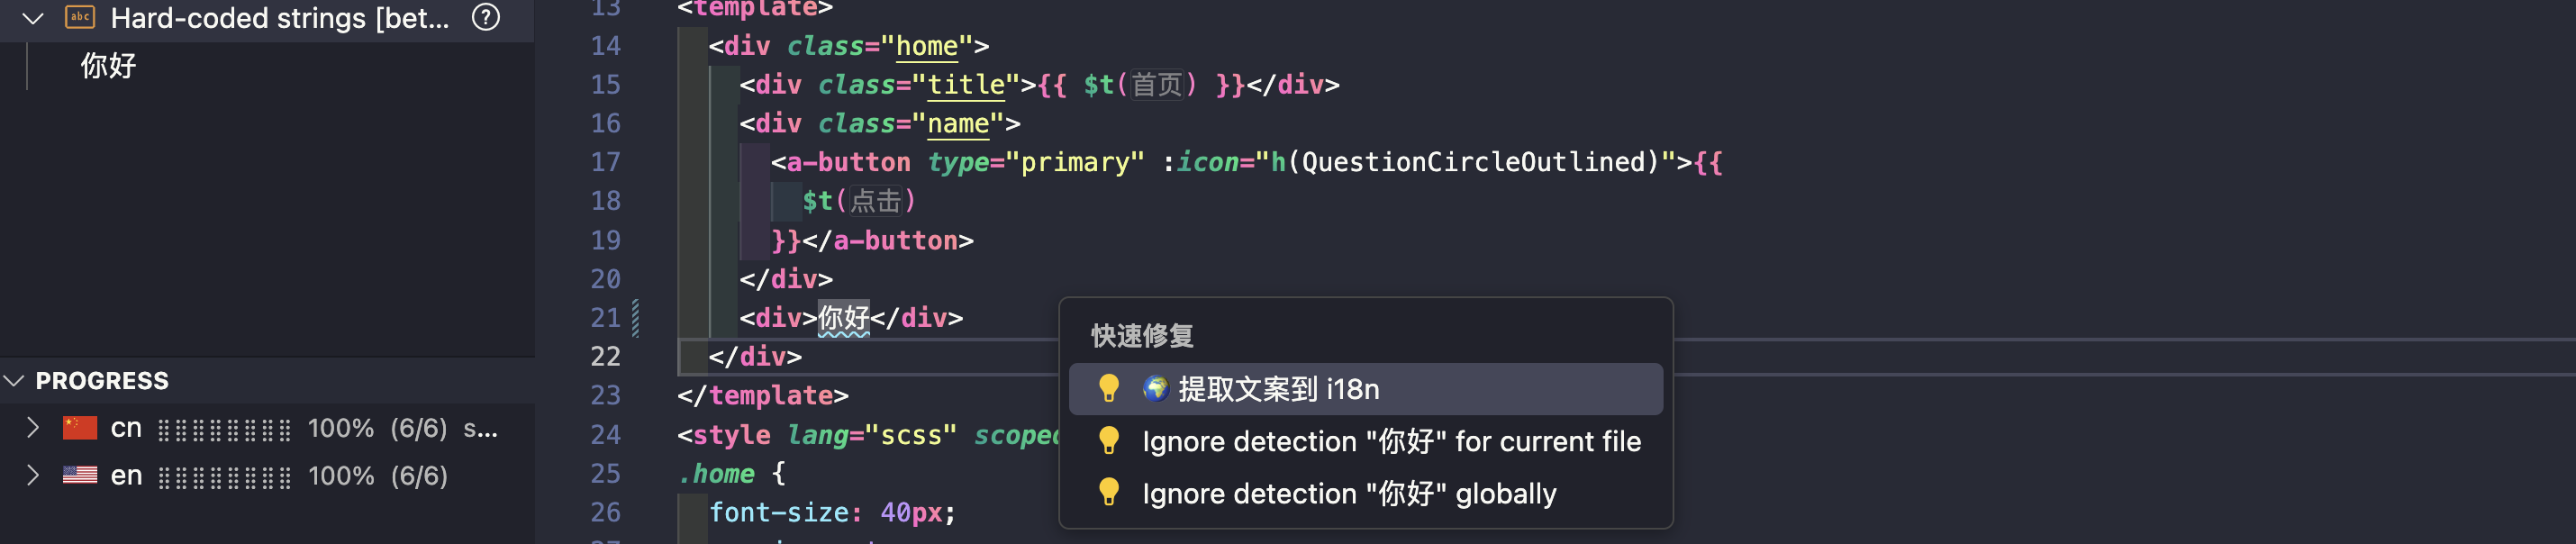
提取文案,生成 key
-
生成路径
提取文案后会生成路径
ni-hao,这里可以理解为「根路径」,但我是使用模块进行区分的,因此将路径改成home.ni-hao。
-
替换内容
这时,可进行内容替换,如是在
template模版中,则使用第一个。
-
基本语言与翻译语言
上一步即可生成 key,但是,生成的是
cn.json的还是en.json的,需要我们进行配置。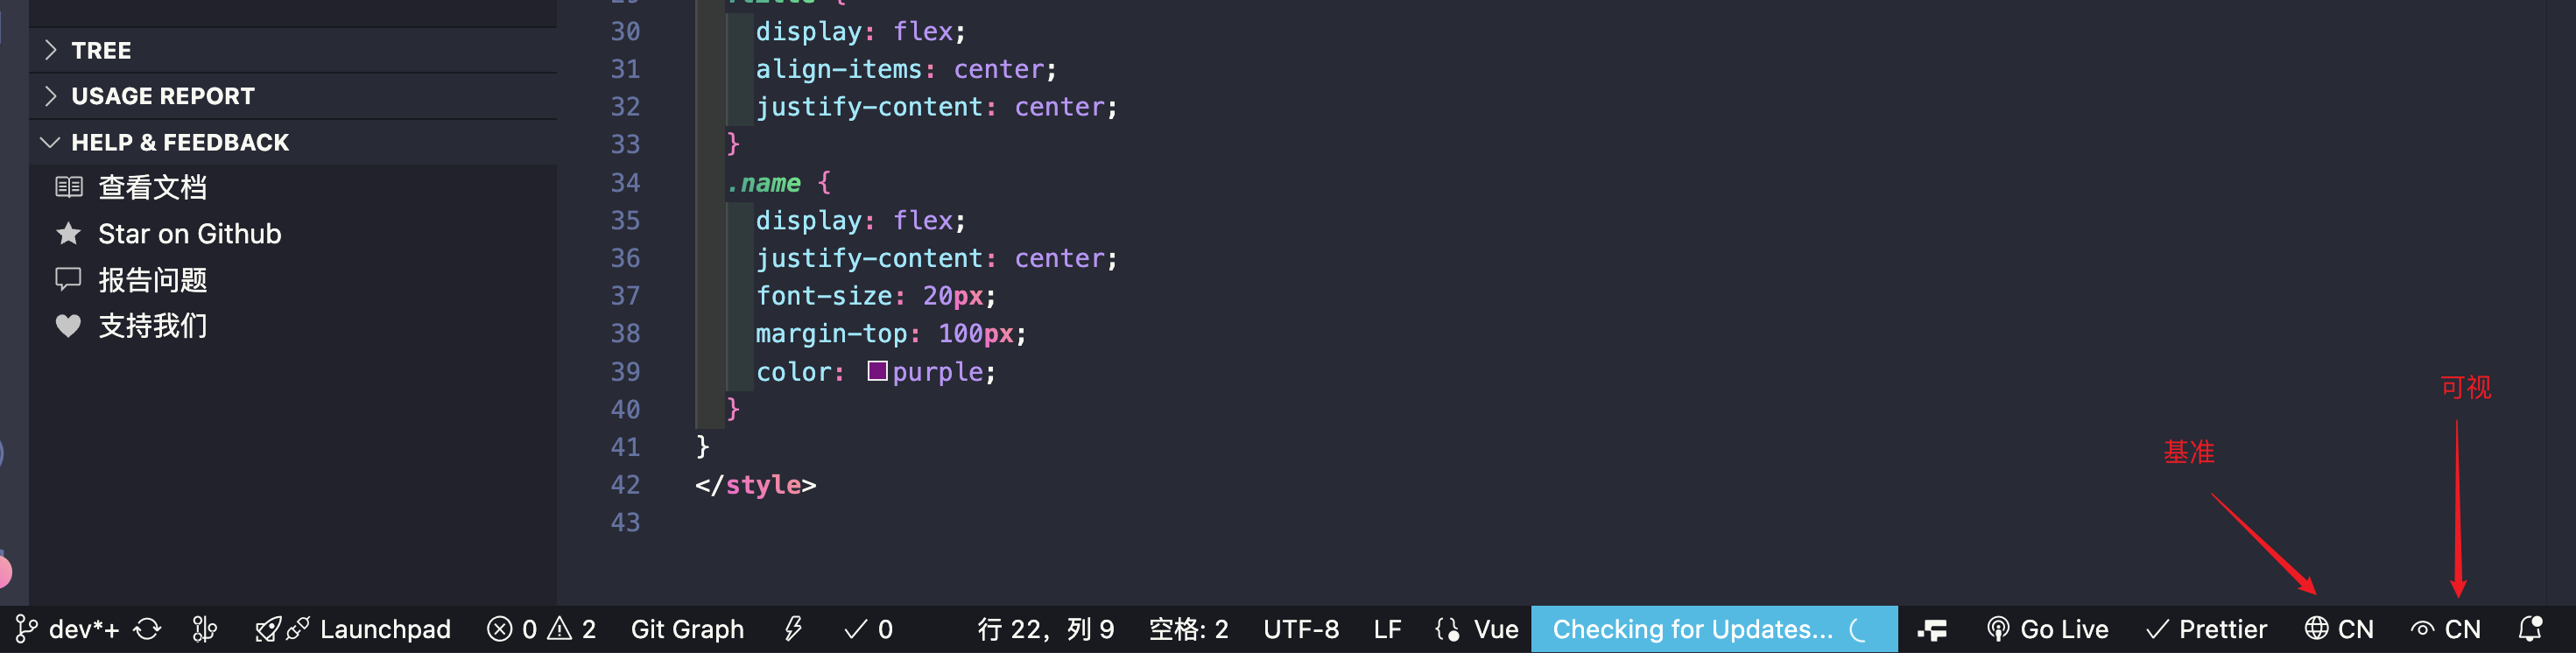
如上图,基准语言则为生成 key 的语言,可视语言即为在代码中默认看到的语言。如我配置的都是
cn。 看一下效果:


-
翻译情况
可以在插件面板查看翻译情况,可以看到,那些内容是已经翻译的。 如之前的 「home.ni-hao」,字段只在
cn.json中有,而在en.json中没有。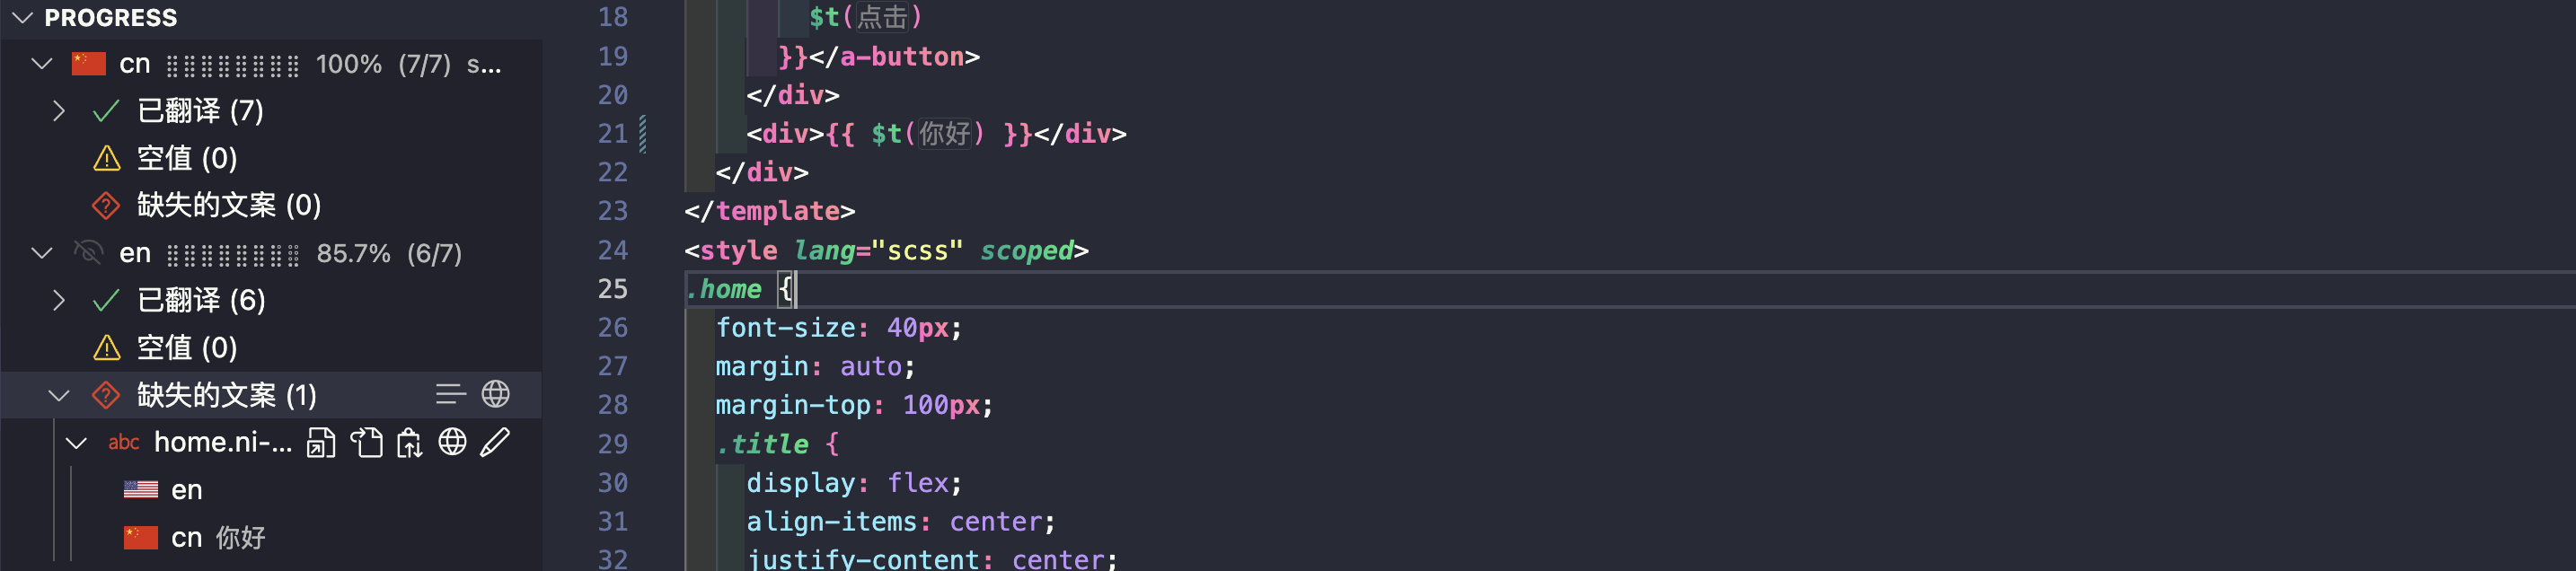
-
翻译
之前英文还未翻译,这时,只需要把鼠标放到那个字段上,即会有一个弹窗,显示 中文的翻译内容,英文则为空。点击英文处的「✏️」,即可填写英文文案。